Whether you’re organizing a small gathering or a large event, setting up your own audio system can be a rewarding challenge. With the right equipment and some simple tips, you can ensure your event sounds incredible without breaking the bank on a full-service rental. Follow these DIY audio system setup tips to make your event sound professional!
1. Start with the Basics: Choose the Right Equipment
The first step in setting up your audio system is selecting the right gear. Depending on the size and type of your event, you’ll need a combination of:
- Speakers: Choose speakers that match the size of your venue. Larger venues need more powerful PA speakers, while smaller spaces may only need compact options.
- Mixer: A good audio mixer lets you control sound levels and EQ to ensure everything sounds balanced.
- Microphones: If you’re hosting speakers or performers, wireless mics can help avoid clutter.
- Cables and Accessories: Don’t forget essential cables (XLR, speaker cables) and adapters to connect everything.
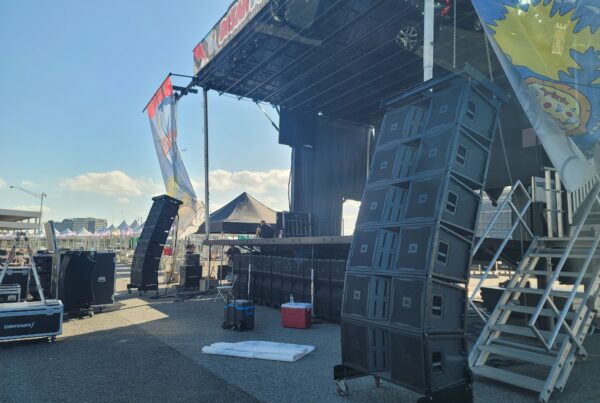
2. Plan the Speaker Placement
Speaker placement is key to achieving balanced sound. Here’s how to set them up:
- Avoid corners: Placing speakers in corners can result in muddy sound. Instead, aim for positioning them on opposite sides of the room, slightly elevated for even distribution.
- Direct sound to the audience: Make sure your speakers face the audience area directly, angling them slightly to prevent echo and feedback.
- Test acoustics: Before the event starts, test the sound in various spots in the room to ensure consistency.
3. Properly Connect Your Audio Equipment
To ensure everything works seamlessly, you need to connect your equipment properly:
- Mixer to speakers: Use the correct cables to connect your mixer to the PA speakers. Typically, you’ll need an XLR cable for professional audio equipment.
- Microphone to mixer: For wired microphones, plug them into the appropriate input on your audio mixer. For wireless mics, ensure they’re tuned to the correct frequency and that the receiver is plugged into the mixer.
- Power amplifiers: If you’re using power amplifiers, connect them between the mixer and the speakers to ensure your system can handle higher power.
4. Test Everything Before the Event
Before your guests arrive, make sure to test the entire system. Here are a few things to check:
- Sound levels: Adjust the gain, volume, and equalizer settings on your mixer to avoid distortion and ensure clarity.
- Feedback: Walk around the space with the microphone to check for feedback. Adjust speaker angles or reduce the gain if necessary.
- Wireless connections: Ensure wireless microphones and other devices are synced correctly.
5. Optimize for the Room’s Acoustics
Every room has its own unique acoustics, which can affect the sound. Here are some tips to optimize:
- Use soundproofing: If your room is too reflective, consider using curtains, carpets, or even rented sound dampening materials to absorb excessive sound.
- Adjust EQ settings: Each room will have different frequency responses. You may need to adjust the bass, mid, and treble to compensate for the space’s characteristics.
6. Safety and Power Considerations
When dealing with audio systems, safety is a must:
- Power distribution: Use surge protectors and ensure that your audio equipment is connected to reliable power sources.
- Cable management: Avoid tripping hazards by properly securing cables and using cable covers or ties to keep everything neat and organized.
- Ventilation: Make sure amplifiers and other gear have plenty of airflow to avoid overheating.
Conclusion: You’ve Got This!
With these DIY audio system setup tips, you’re ready to tackle your next event with confidence. Remember that the most important thing is testing everything ahead of time and ensuring the sound is clear and balanced for your audience. If you need any help with equipment or recommendations for your next event, don’t hesitate to reach out to us at AudioSystemRental.com—we’re here to make your setup easy and stress-free!